[please login to make this ad block disappear]
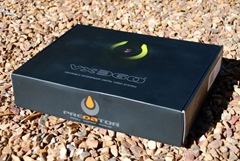
Independent Playak Review: Predator VX360 Waterproof Actioncam
 Independent Playak Review: Predator VX360 Waterproof Actioncam
I’m the kind of person who is happiest in the water and I love to share my adventures with family and friends through the video and photos that I take. So I decided to test out a waterproof camera to capture the action from a personal perspective. Over the last few months I’ve been able to get some exciting footage which was not possible before and test the camera in some tough conditions. Here is the result.
What It Is / What You Get
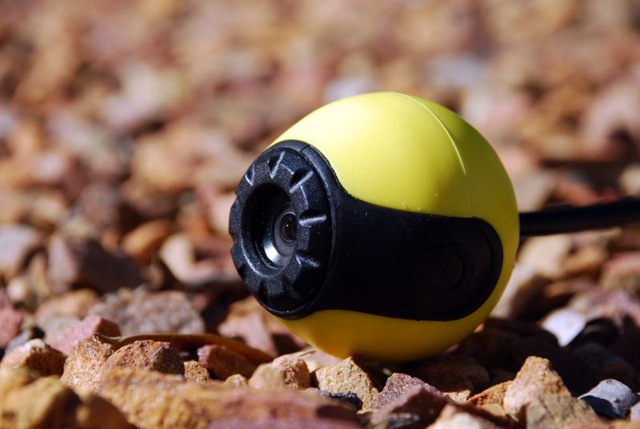
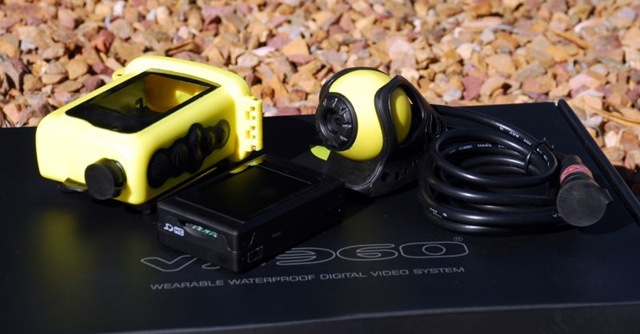
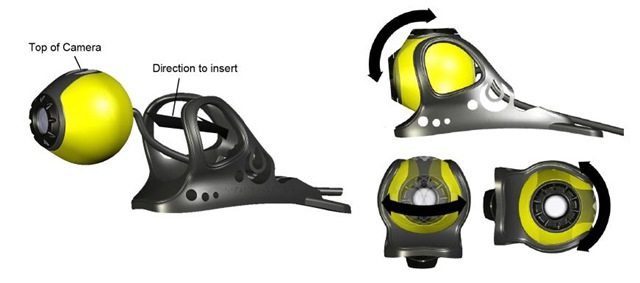
The VX360 is a fully waterproof system. It has an eyeball camera that is connected via a cable to the recording case that has a strap that is attached to your arm, or whatever else you can think of. The camera head can be mounted in a special mounting that holds the eyeball camera and can be further secured using cable ties through convenient holes or duct tape. It holds the ball as well as pinching the cable to keep it secure. I windsurfed with it without any cable ties or anything and the camera remained secure enough. If I was sailing in the waves I would have taken the extra precautions. This mounting can be attached to a headband via a Velcro attachment which again served me well for windsurfing on flat water. There are also two Velcro pads which are adhesive and can be attached to a helmet etc. This is what I did for all the kayaking and bodyboarding, but then I secured the camera and mounting further with duct tape because the impact of waves can be quite savage.
The construction of both the eyeball camera and the PVR housing is very strong. I think you will break before it does. This is a well manufactured product.
What you get item by item is detailed below.
Main Tray:
• 1 Eyeball camera with cable and connector
• 1 Eyeball camera socket mounting bracket
• 1 PVR control case (personal video recorder)
• 1 Control case strap mounting bracket
• 1 Neoprene arm strap
• 1 Neoprene head strap
• 2 Stick-on mounting pads
• 1 Quick reference guide
• 1 SD Card (it’s a 2GB card and I used this throughout the testing period)
Tech Pack:
• 1 Personal video recorder – PVR (this slides inside the PVR control case which is a waterproof unit and houses the microphone too and this also has a full colour screen where you can review the footage right away)
• 1 Li-ion battery pack
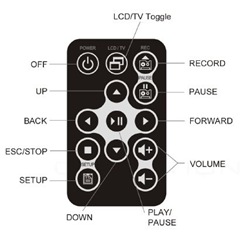
• 1 PVR remote control unit (you can control the PVR with this and also plug the unit into your TV for easy viewing!)
• 1 Mains charger DC 5V
• 1 UK & Euro plug adaptor (those square shaped ones)
• 1 PVR to TV cable (RCA)
• 1 PVR to PC cable (USB)
• 1 Stereo earphones
Operation
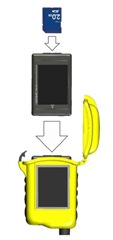
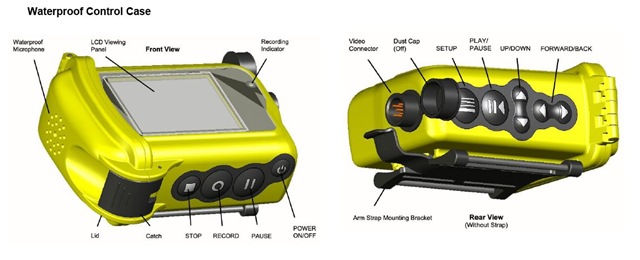
Straight from the box one can use the unit. Place the battery, slide in the SD card, put the PVR into its waterproof case and connect the camera’s cable to the casing - go. The buttons are big and easy to use with a positive feeling. One turns it on and simply pushes record, which begins then right away. A red light indicates that it is recording and one can see this even in bright sunlight. There is also the full colour screen so one can adjust the camera to the desired angle and one can be sure to get the right angle. Footage can also be reviewed immediately afterwards! This is definitely very handy is you’re trying some new move somewhere and your mates are videoing you. Right away you can see what you’ve done wrong and troubleshoot from there.
Once recording the screen stays on a preset time and the least amount of time is 30 seconds, which I personally found too long and would have preferred an option to include 5 or 10 seconds to save battery life. The options currently are 3 minutes, 1 minute or 30 seconds. Once the screen is off you have to press any of the buttons to activate the screen again and render the buttons effective. By that I mean to stop you have to press stop twice to actually stop. I guess a nice safety feature but annoying if you’re sitting in big surf and need to keep paddling not pushing buttons to avoid getting beaten.
As mentioned already, the PVR can be connect to your television for review and the remote control can also be used to make it even easier to operate from the comfort of your chair.
The settings on the camera and all operations are very easy to do. I almost never used the manual for anything and just figured it out quite easily. I don’t believe anyone will struggle.
Software
On the SD card supplied is the software that can be used to download and edit footage – Predator Splitscene 3. With this you can do basic editing and post to the internet. I would imagine most people would use their own form of editing software but at least this gives you another option. I always used it to download from the unit to my computer.
Technical Specifications
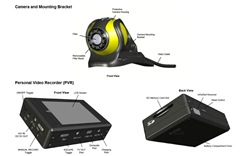
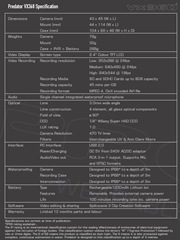
The unit records up to 24 frames per second using a Sony Super HAD CCD sensor and a 3mm wide angle lens with record onto a SD or SDHC memory card. There are 3 video quality settings to chose from. A 4 GB cards can take over two hours of footage on the medium setting. It will record on up to 32 GB cards. I recorded everything on the ‘medium’ setting. For a much more detailed account of the specs please look at the photo below. Click to make it larger.
The Test Environment
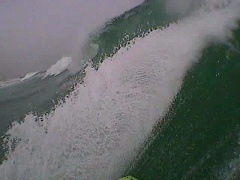
The test environment was mainly on the West Coast of South Africa. The water is cold and the waves generally big and renowned as very powerful. The camera and unit never misted up once, and remained 100% dry at all times. I was impressed as my body took a lot of punishment during one of the kayaking sessions and the equipment performed flawlessly. I tested this unit much more than necessary, possibly because it was so much fun.
Review Video
Conclusion
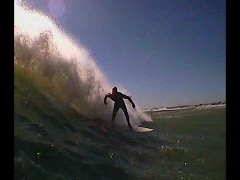
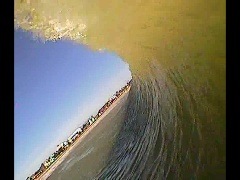
The Predator VX360 withstood everything I could throw at it. I dropped my helmet on a tarred road with the camera attached and it took the direct impact, it wasn’t damaged in the slightest. Throughout the test everything remained dry. The buttons worked when I wanted them to work and I never missed anything that I wanted to capture. The full colour screen to review footage afterwards worked really well and is definitely a major selling point to this unit. The battery lasted close on two hours in the surf with it being on the entire time and then filming when necessary. The only gripe I have is the quality of the footage. For internet videos and to show your friends this will satisfy your needs, however if you wish to create movies of DVD quality you’d have to wait until they bring out an upgraded version, perhaps even in HD. But overall an excellent camera manufactured to a high standard.
Details
• Website: http://www.predatorworld.co.uk/
• Retail price: 399.99 GB Pounds
For Playak,
Adrian Tregoning
Forums
- Add rocker on a Sup » Hello there... (River SUP)
- 11' hard for river » Thanks, But is'nt for the same river... (River SUP)
- sup master instructor course from the Italian Federation for Amateur Paddling: October2016-June2017 » You should check out the ACA SUP program, as it sounds kinda similar...
- Waterblading - Send your Pics » bounce...
- Show us your SUP fish pics! » Extra Wide SUP for Fishing WideSUPfor2-2-3... (SUP Fishing)
- Michael Dolsey SUPs Has Just Opened a Southern California Distribution Center » NEWS FLASH Michael Dolsey Stand Up Paddleboards has just opened a southern California Distribution Center servicing the entire West Coast market...
Login to post here






 Get for free:


